Vacation flipbook
One of the best things about digital photos is that you can do more than put them in a box. Over the years I've accumulated hundreds, maybe thousands of photo prints in boxes that are gathering dust on bookshelves or shoved under the dining room cabinet. One of these days I'll put the photos in albums. Really, I will.
 Nah, I won't.
The only way at least 600 will get out of those boxes is if I finally send them off to be scanned as I planned months ago.
The digital photos have seen the light of day in a number of ways, from playing cards to posters.
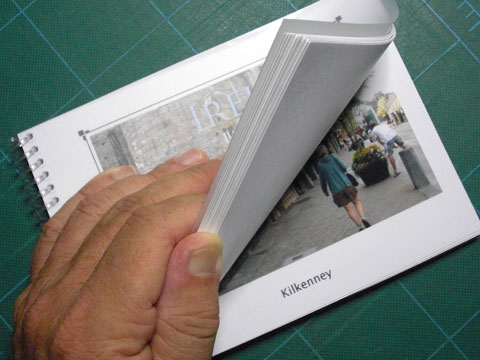
Here you see my most recent project, a flipbook of 45 photos from our recent trip to Ireland.
Using Snapfish.com, two copies of this 5x7" book cost $52 including shipping, tax, and a 20% discount. I'm fairly happy with the results but am thinking that I might try a different approach next time. Let me explain the process and what I might do differently.
Start
I store my digital photos—most taken with the Casio Exilim EX-S10 that I carry everywhere—using iPhoto on my Mac. At this point I have at least 5,000 images, organized by date, mostly.
With vacation photos I usually set up an iPhoto album, picking the best shots but not being super-picky—yet. When I'm ready to start assembling the calendar, book, etc. I open each image in Photoshop and do a few quick editing steps. Geek alert: skip the next paragraph if you're not interested in Photoshop.
First I straighten it if necessary, usually concentrating on getting the horizon right. Then I do brightness/contrast/color correction using Levels and/or Curves as needed, occasionally followed by Shadow/Highlight. I sharpen the image using Unsharp Mask. Finally I crop to the size I plan to use it. The Ireland flipbook used 5x7" images at 288 ppi.
I'm more selective with images as I go through this process. Maybe they're a bit out of focus, or I can't crop them in a way that seems right. Those don't get saved. The ones that make it are saved to a new folder for that project, like Ireland_2010. I name images using the date taken and a short description. The image above is named 081310_flipbook.
Upload to the web
The next part will be similar with any online service. In the past I've used Kodak and Shutterfly, probably switched to Snapfish because they offer good discounts (40-60%) on a regular basis.
You go to the website, click on Upload Photos, and follow the instructions. Kodak used to require that you download and install their software to manage uploads. Snapfish has a very speedy uploader that's completely web-based.
Once your photos are uploaded to an online album you choose the type of project you want to make and follow the step-by-step instructions. For my flipbook I first choose a style and then had the option of adding captions to each page. In some cases you may be able to do simple adjustments to the photo's cropping if it's not sized exactly right. The online services will do automatic color/contrast adjustments for you. Since I've done that myself in Photoshop I have to be sure to turn that OFF.
When you're finished you be able to review a digital simulation of the project and go back and make changes in the order of photos, add or delete individual images, change captions, etc. When you're satisfied you go to the Checkout. Be sure to check the website first for any special promotions. You'll need to type in a code to get the discount.
Do the credit card thing, then sit back and wait for your project to arrive in the mail. During peak holiday times the service may be slower, but recently things I've ordered from Snapfish have arrived in 3-7 days from when I submitted the order.
The results
I've been pleased with the quality of most of what I've ordered, and Snapfish is very accommodating if you're not satisfied. I contacted them online about how the image was placed on some wooden photo panels I ordered and they sent me two replacements that arrived in three days. No hassle at all.
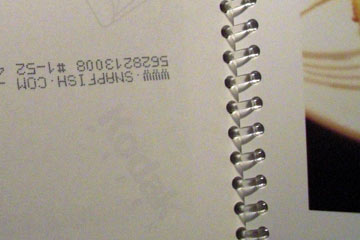 The flipbook is pretty much what I expected except I was surprised that each page is simply a standard photo print, with date information, etc. printed on the back.
In reality the book is just a stack of prints that have been bound together with a plastic coil binding. This got me thinking: maybe it would be better to order the prints separately and get the binding done locally at a Kinkos or Staples.
DIY version?
I checked out buying prints only and for this 45-print book I'd save a couple bucks at most, depending on what the binding would cost. What I'd gain, though, is more control over the arrangement of photos, and more importantly the captions. A Snapfish Flipbook can only have one picture per page and a one-line caption. You have no control over the size, font, color, or placement of the caption.
If I laid out each print/page in Photoshop I could use two or more images and control everything about the caption, including where it appears. This was probably the most frustrating part of putting together the Ireland book. I often wanted longer captions, or would have put them somewhere other than centered under the photo. Several times I wanted a vertical photo with the caption to its left. No can do.
The trade-off, as usual, is convenience vs. control. It's relatively quick and easy to just plunk photos into a preset template and type a few words. If I get into designing each page I'll probably spend twice the time putting a similar book together. The cost will be comparable, maybe a little cheaper. But... it will end up exactly as I want it. Next time.
Vacation update
 Just added:
Drive to Kilkenny; Yummy treat; Kilkenny; Black pudding
— July 27, 2010